
This repo stores a collections of low cost CH552G powered DIY macropads designed by tobychui
 tobychui
6e2d071bdb
上傳檔案到 '4x5Macro-Numpad/PCB'
tobychui
6e2d071bdb
上傳檔案到 '4x5Macro-Numpad/PCB'
|
1 year ago | |
|---|---|---|
| 4x5Macro-Numpad | 1 year ago | |
| 4xMacropad | 1 year ago | |
| docs | 1 year ago | |
| img | 1 year ago | |
| tools | 1 year ago | |
| LICENSE | 1 year ago | |
| README.md | 1 year ago |
README.md
CH552G DIY Mechanical Keyboard Archives
This archive stores all the required design files for DIY macropads / keyboard of all sizes and layouts. If you are not experience enough to build one or you just want to get a sample before making a few for yourself, you can also find pre-assembled samples on my Tindie Store.
Gerber files of PCB files will be released with each of the new layout release without the schematics. The schematics will be released following the next layout / design to make sure I got enough funding to iterate more layout and open source them for free. Thank you for your understanding!
4xMacropad
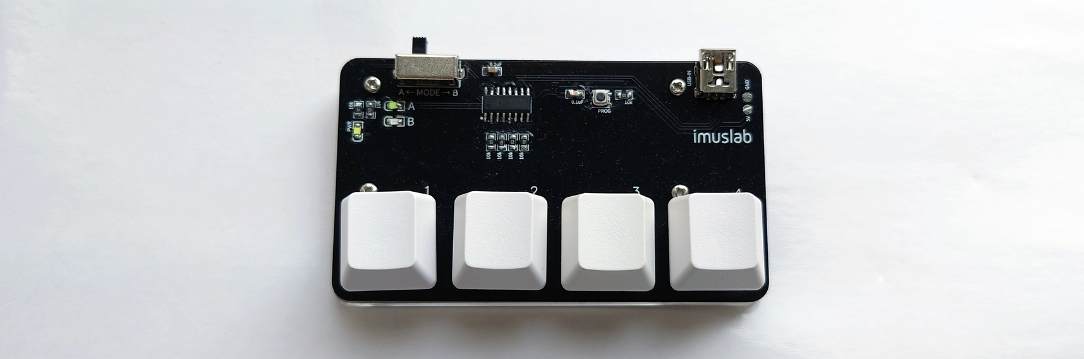
An ultra low cost, 4 keys mechanical macropad using CH552G. See the /4xMacropad/folder.
4x5 Macro-numpad

Another ultra low cost macropad + numpad powered by CH552G with two layouts on the same PCB. See the /4x5Macro-Numpad/ folder.
Build Instruction
Send the PCB to print (See /PCB)
Purchase all the required materials (See BOM list)
3D print the base plate (See /3D Model)
Install the required Arduino library for CH552G and drivers
Visit 4-key Macropad | imuslab (4xMacropad only) or modify the sketch in /firmware folder
Flash the CH552G with the sketch
Program Flashing Instructions
As all the keyboard designs share the same MCU and programming button design, this instruction should be suitable for all the macropads / numpad in this repo.
Hold and press the PROG button on the PCB
While the button has been held, insert the USB cable into the mini USB port
Release the button when the Arduino code has finished compiling and ready to upload (Timing is important)
Wait for the upload to complete
License
Software: MIT License
Hardware: CC BY-NC-SA